I love both Makita and Festool brand tools and I’m here to perform a candid evaluation to see what difference can be found when it comes to set up time.
For the hobbyist this may not make a big deal, but for full time woodworkers juggling multiple projects at once, this could equate to hours of saved time over the course of a week or even a year.

As with most woodworkers I’ve talked to, I started out with low cost and hand-me-down equipment. Like my first router, a Ryobi from Home Depot. It was budget friendly but it didn’t have a lot of jigs attached to it or have the ability to make micro adjustments. However it got the job done when I first started and helped me hone my steady router hands.
After that I moved on to a combination of 3 Makita routers. Like Goldilocks, I found a small one that is a cordless trim router https://amzn.to/2Ku5bJA, a medium one that has a quarter inch shank, and a large one with a half inch shank. Depending on the work needing to be done I’ve used one or all three to produce hundreds of woodworking pieces.
Most recently I expanded my collection with the Festool OF 1400. I found it interesting that it came with a number of collets that can be switched back and forth. Whether I need a half inch or quarter inch shank it doesn’t matter, I just swap out for what I need. As this is quite different from the Makita’s I’m used to, I wanted to compare the difference in SET UP TIME. Spending long days in the shop I can attest that quick set up times make the day go by faster and allows me to get more work done.
The goal is to keep my shop efficient while working on multiple projects at a time, so set up times matter very much to me.

When shopping for a new router there's a few things most woodworkers look for:
Power + Motor + ability to turn a bit around.
Some of the pros and cons weighed could include a soft start, a brake, bit transferability, and more. But let’s pretend for this conversation that the routers being compared all cut the wood the same, so we’re going to compare the process required to get set up with each brand. We’re going to look at how much time it takes to grab the machine, get the right bit and bushing tightened in, add the base plate on, then get it adjusted and set so you can make repeated cuts. Why does this matter? If one machine takes you 6 minutes to set up, and another takes you only 3, then imagine the time savings you would have over a year and hundreds of machine uses! And let’s be honest, the fun of woodwork is not setting the tools up... The fun of woodwork is actually cutting into wood!
CHANGING BITS
MAKITA - On my large Makita, to change the bit I have to push a button and use a wrench to turn it, take off the bit, put in a new bit, and wrench it back on. The medium Makita takes two wrenches for the same task. My small Makita has an added step of popping off the head.
FESTOOL - This has a convenient DOWN button and an UP button that turn the collet into its own ratchet. It seems like that may be a small feature, but it’s such a time saver to have the ratchet installed into the bit changing system, versus needing to use a wrench where you have to set it in, turn, readjust, turn, readjust, turn, etc. If you’re a fan of saving time when changing bits then this feature is a huge deal!


BASE PLATES and BUSHING.
If you’ve seen lots of my videos you know I like to use different base plates like Milescraft mortising pin https://amzn.to/3frsmQ3that makes your routers more useful.
MAKITA - To attach any base plates you need to find the center, screw it on and you’re set.
FESTOOL - Festool recognizes that you’re going to make changes many times, and that having to set it up and center it can take some time. They’ve got a bushing guide that's quick to clip in and get ready for working. To take it off, you just need to push two buttons and it pops right out.

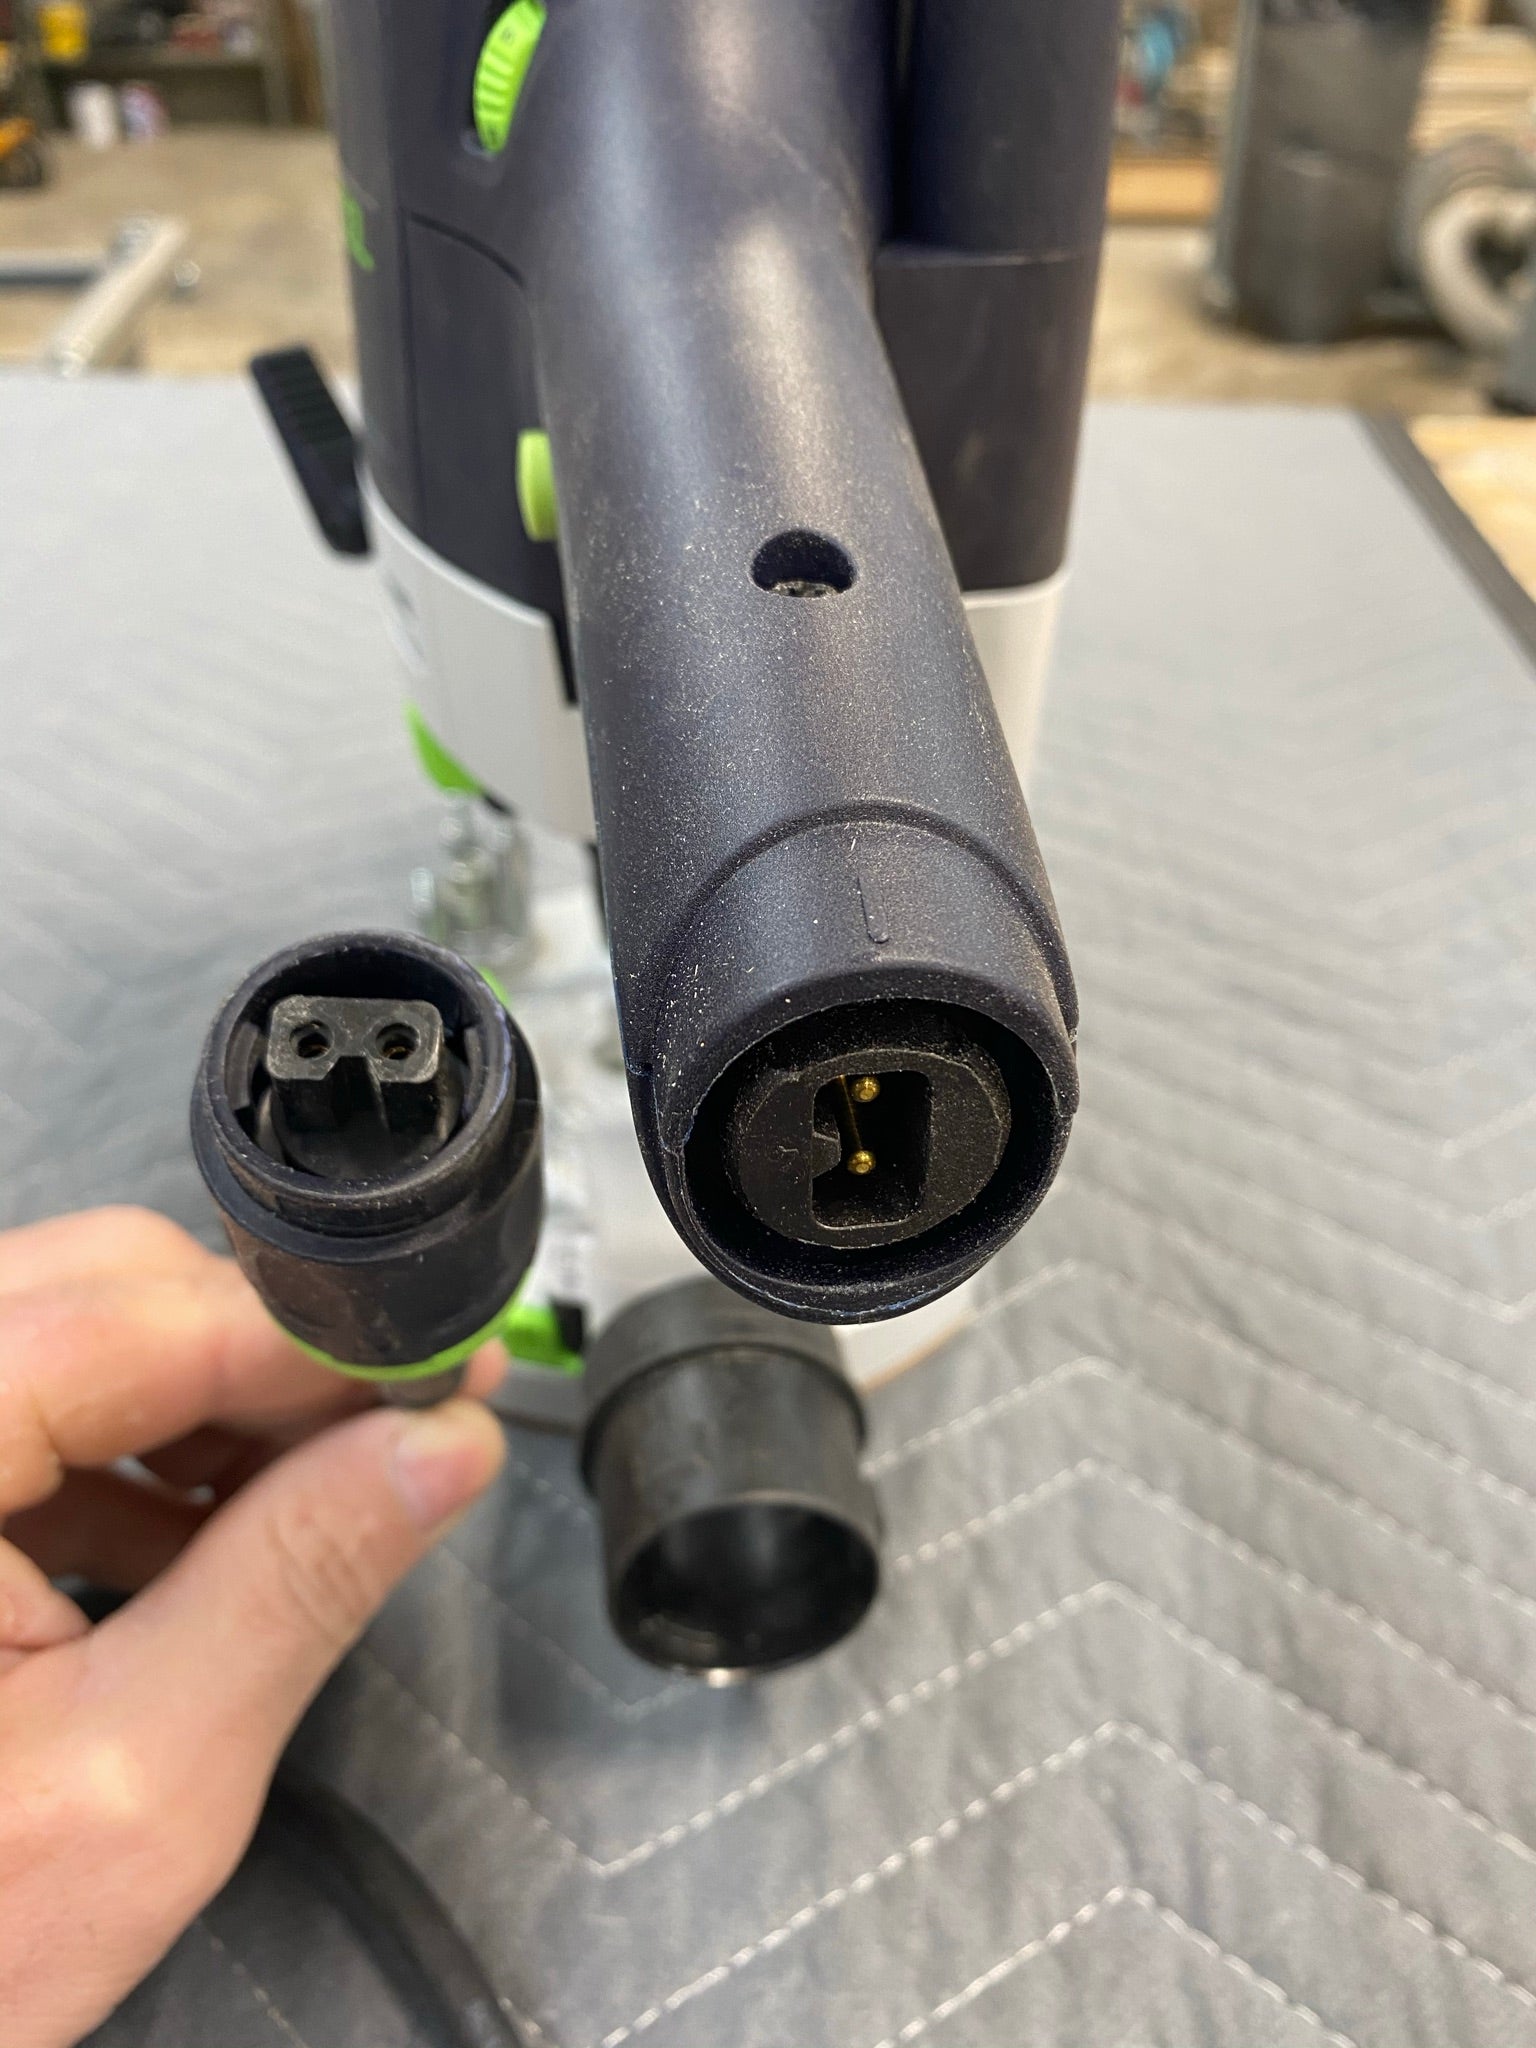
POWER CORD
MAKITA - As with most corded equipment, the cord can be rolled up. Makita also has a variety of units that are battery operated. I have both and use each for specific tasks. Some models come with variable speed controls.
FESTOOL - Unlike other routers I’ve used, the Festool cord does come off, which is nice for transport and storage. To plug it in, just an extra twist locks it in place and it's nice and snug during work. This model I have does have variable speed control.
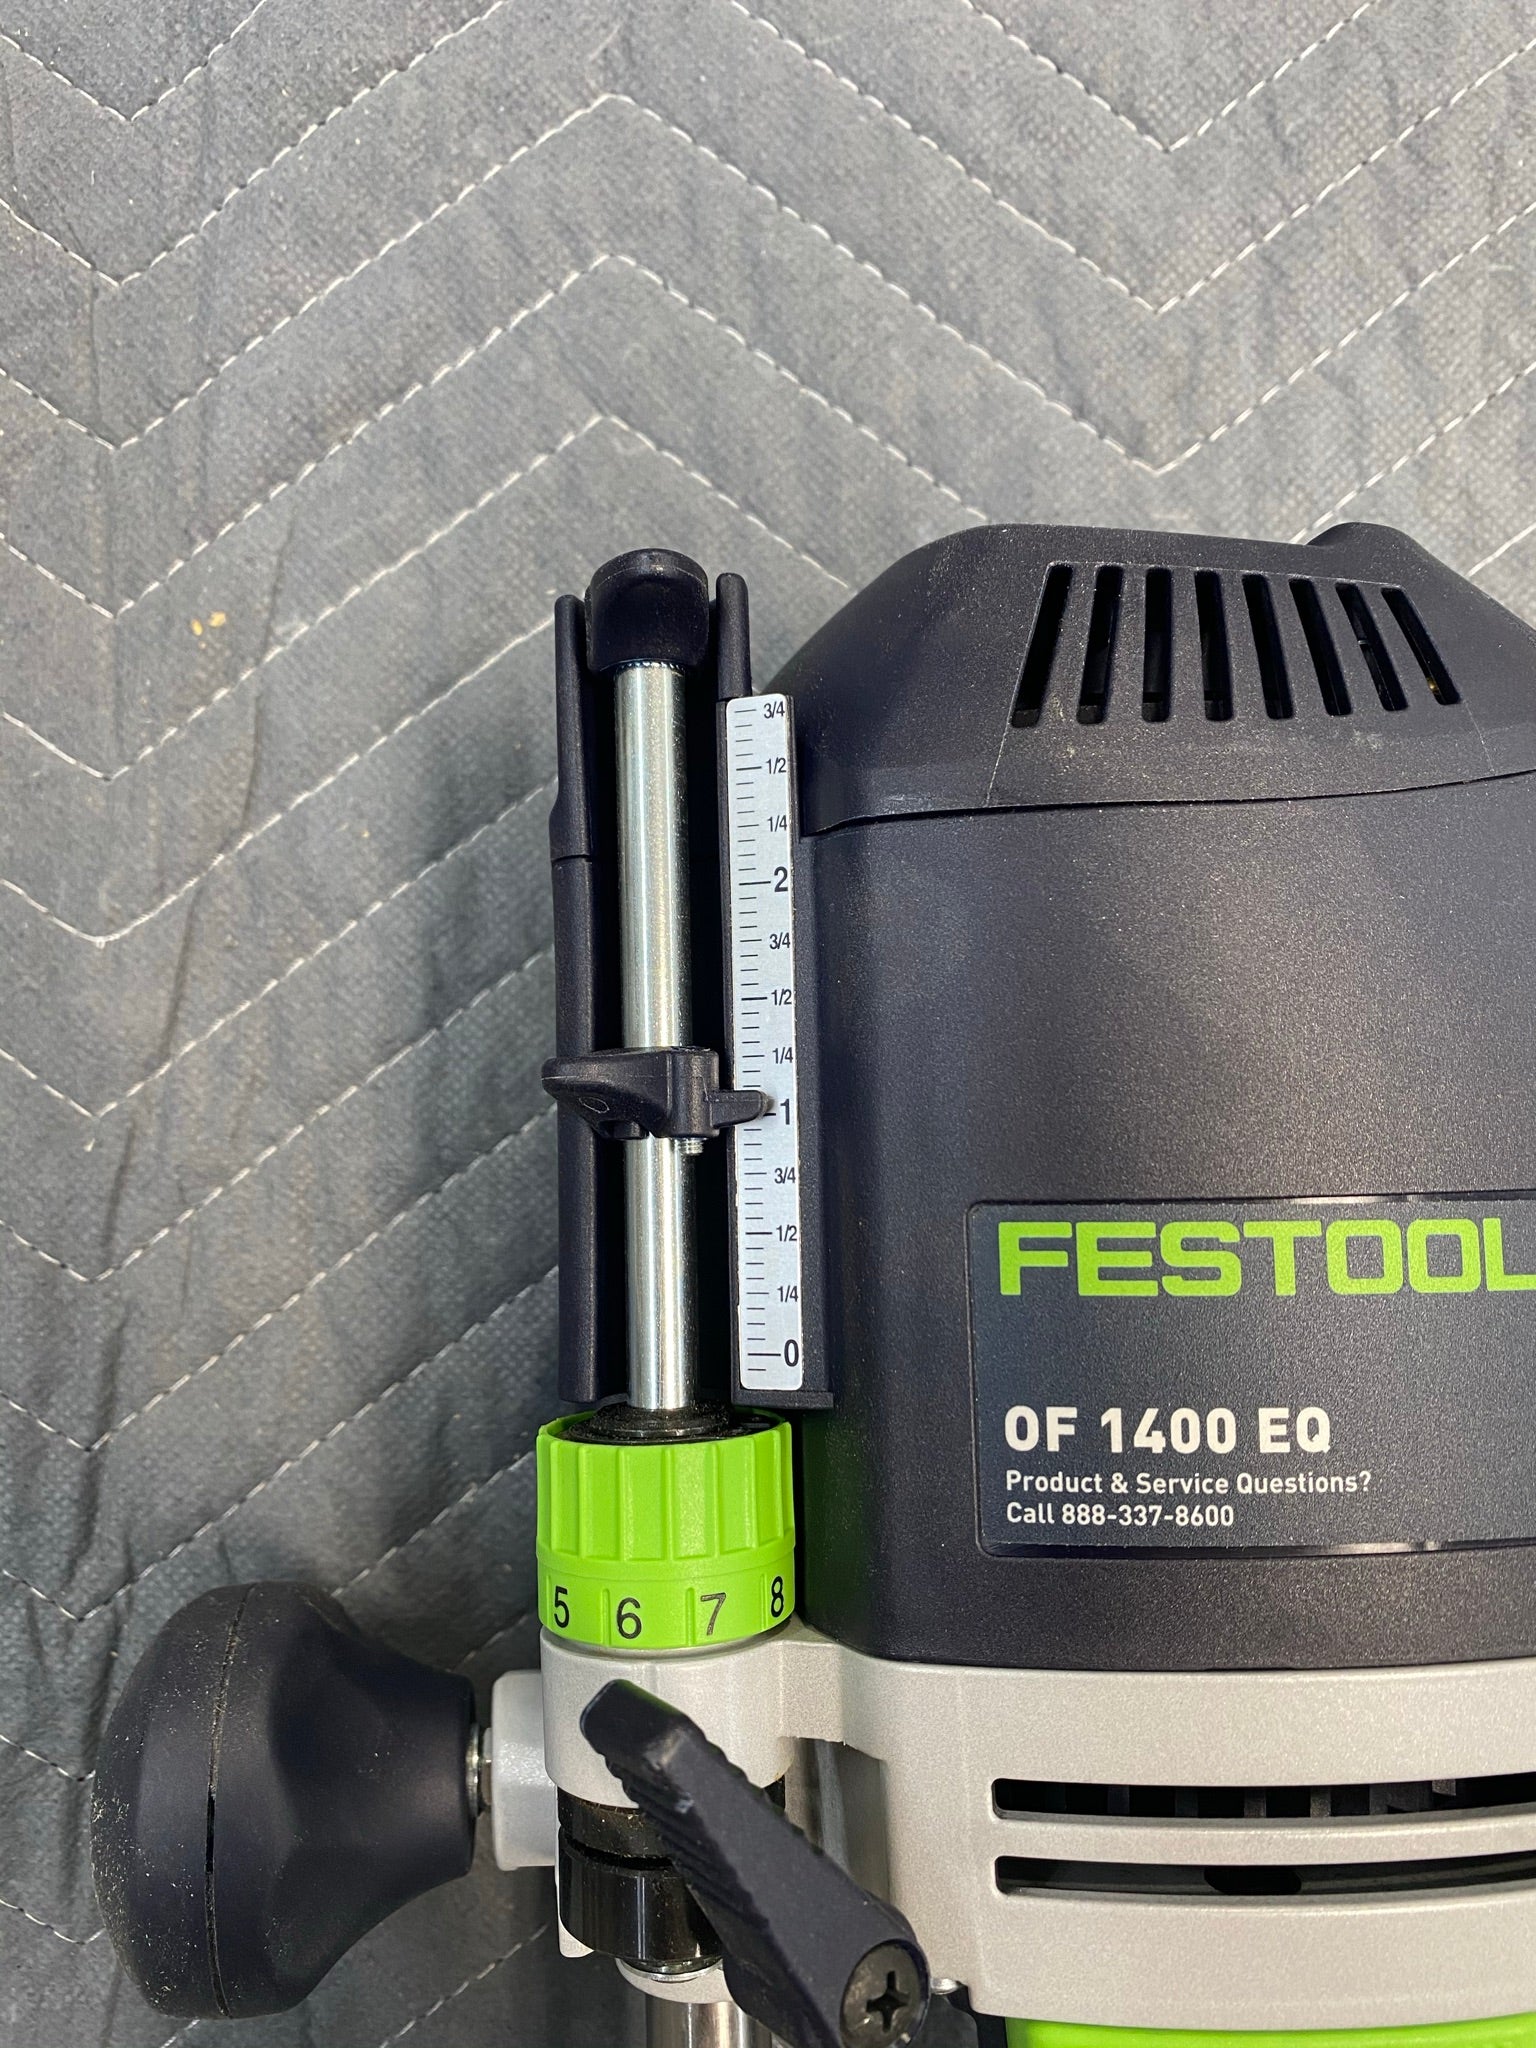
SET UP TIME
MAKITA - In order to change where the depth rod is hitting, loosen the fastener and press a button and the thread rod is mobile and ready to be tightened in place for your needs. Once you’ve set that, move the depth stop into place and you can then make micro adjustments with the tightener up top.
FESTOOL - Instead of a threaded rod it's a smooth rod to set depth, and the depth guide is located right next to the marking numbers which helps be more accurate when setting the placements. Setting the depth happens in one step and it's quickly done which helps save time again.

SETTING DEPTH
MAKITA - Push the unit down and use the wingnut on the back side to lock.
FESTOOL - Twist the release, push down and lock in place desired .

DUST
When pairing a dust collecting system with a router it's good to remember that routers create dust and it’s shooting at different angles at a high power velocity.
MAKITA - With the dust port attached, there still is some space for dust to escape.
FESTOOL - The round collet fits just within the dust collection opening and is much more efficient at collecting most of the dust. Festool also has a dust collection from the bottom on jigs like edge routing, so it could be doing double the dust collection.

TRACK ADAPTER
MAKITA - Once the router is on the track, if you want to make adjustments to where it sits just two wingnuts need to be loosened and the router slides side to side. To take it off, 4 wingnuts need to be loosened releasing the back side and the router slides off the track attachments. The back side has an elevation so you can set the router so it sits straight at the height of the track.
FESTOOL - The two track adapter rods fight directly into the base of the router and a single twisting nut locks both mechanisms simultaneously to secure both tracks. These rods fit both the router track kit and an edge routing guide, both of which have micro adjustment options after being slid on.


Which one would I recommend? That depends on the amount of woodworking you expect to do on a regular basis and how much you’re interested in saving time.
I love Makita! I have been using it for years and have always shared my enthusiasm for its abilities. I’m not complaining in this comparison article, the machines are amazing and I’ve been very happy with their service in my shop. When examining the steps required for set up and changes, this would come out in second place.

Out of the box, the Festool’s engineering and clever designs gets me excited to get to know this brand. Playing with this machine and retraining my habits for setting up and changing bits I’m very impressed with how quickly I can get to the actual woodworking. When considering the time I spend setting up routers day in and day out I believe that Festool has offered up many time saving solutions. Top notch.
